How To Create Successfull Blog In Hour
Want to start blog? Need simple process that can be completed in 60 minutes?
Starting a blog seems to hard but not really much harder, if you have right choice on tools. Today we are going to create a starter blog with comments and subscription, isn’t it amazing? yeah, let’s get start it.
Assumptions
I assume, You knew some basics about How reactjs works but if you don’t knew the basics start from here. Please dont’t get too hard on it, just need to know basics of reactjs and structure of the app.
Getting Started with Gatsby.js
Install gatsby-cli by executing following command
npm install --global gatsby-cliabove command will install gatsby-cli globally which is going to helpul for createing our first blog. (Note: Node.js is required to install gatsby-cli)
Select Starter
Gatsby Community provides multiple starters for creating new blog, find out from here. I prefer to use lumen starter by @Alexander Shelepenok. ❤️ Thank you man!
install Starter
Install lumen starter into your personal computer by executing following command from Command Prompt / Terminal whatever you prefer.
gatsby new lumen https://github.com/alxshelepenok/gatsby-starter-lumenIt will create directory named lumen and installs all dependencies in a single shot (impressed!). The project will have following directory structure
└── src
    ├── assets
    │   ├── fonts
    │   │   └── fontello-771c82e0
    │   │       ├── css
    │   │       └── font
    │   └── scss
    │       ├── base
    │       ├── mixins
    │       └── pages
    ├── components
    │   ├── CategoryTemplateDetails
    │   ├── Disqus
    │   ├── Links
    │   ├── Menu
    │   ├── PageTemplateDetails
    │   ├── Post
    │   ├── PostTemplateDetails
    │   ├── Sidebar
    │   └── TagTemplateDetails
    ├── layouts
    ├── pages
    │   ├── articles
    │   │   ├── 2016-01-09---Perfecting-the-Art-of-Perfection
    │   │   ├── 2016-01-12---The-Origins-of-Social-Stationery-Lettering
    │   │   ├── 2016-02-02---A-Brief-History-of-Typography
    │   │   ├── 2017-18-08---The-Birth-of-Movable-Type
    │   │   └── 2017-19-08---Humane-Typography-in-the-Digital-Age
    │   └── pages
    │       ├── 2015-05-01---about
    │       └── 2015-05-01---contact
    └── templates
└── gatsby-config.js
Run Project
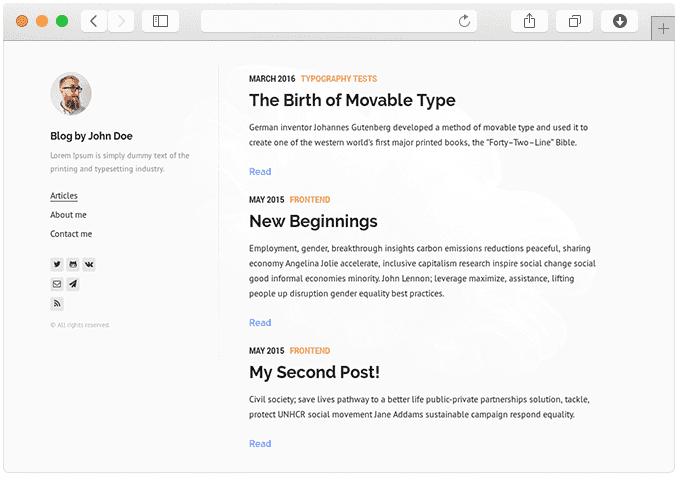
Open command prompt / Terminal and hit gatsby develop from lumen directory. It will run our first blog via local server on localhost:8000 url. 🎉 🎉 🎉
 Example of running lumen blog starter.
Navigate through
 src/pages/articles where you can find blogs and their related images. Also you can just add new blogs and delete old ones.
Edit Configuration
find gatsby-config.js from root directory and edit title, subtitle and author information, Here you go our blog is ready to deploy. You can change avatar by navigating through file src/pages/photo.jpg and just replace with your avtar.
Deploy On Github Pages
Now it might seems like what about deploying this blog? So we are going to deploy it on Gihub using Github Pages.
First of all create public repository with gh-pages. run following command to install it.
npm install gh-pages --save-devthen add following deploy script to package.json
 {
        "scripts": {
            "deploy": "gatsby build --prefix-paths && gh-pages -d public --branch master",
        }
}
file: package.json
why I had set branch as master? becuase github pages requires master branch for deploying pages. You need to add pathPrefix into gatsby-config.js to let gatbyjs know which repository to select.
module.exports = {
    pathPrefix: "/github username"
}
file: gatsby-config.js
Next step is checkout your github repository to exisiting directory and deploy blog. Execute following commands to init git repository and add origin to your project.
cd lumen
git init
git remote add origin https://github.com/your-user-name/your-user-name.github.io.git
git fetch
git branch master origin/master
git checkout my-blog
git add .
git commit -m 'first commit'
git push
Here, I had choose my-blog branch for source because master will be used for deploying compiiled blog source.
Bingo you are now ready to launch. 🚀 just hit following command.
npm run deployThen open your-user-name.github.io and here we are, after hard work of one hour. Now you are thinking What about anyone want to comment on post? What about anyone want to subscribe to blog? I will write about both of them in my next blog keep in touch.
P.S. If you liked post and want subscribe for next post just enter your email into input at end of post and any suggestions and comments are welcomed. just put your thoughts into comment box and I will try my best to improve on it. Thank you. for more information navigate through official site of gatsby Happy Exploring.